Easy Food Prep
For many, the idea of meal prepping is a something they have thought about, but never actually put into action. For others, the idea of setting aside time to cook a lot of meals can be daunting. Who has time for hours and hours if cooking in a day?
Life has a way of getting busy, and downright chaotic at times, and may seem that we simply can’t find one extra hour to set aside for food prep. I totally get it, really I do.
When I started I felt the same way. Between working outside the home, homeschooling, and my everyday mom chores I had no idea how I would ever find the time to meal prep on my days off.
Thankfully, I have learned that meal prep and freezer cooking doesn’t have to take up your whole day if you don’t want it to, and the benefit of a little extra time preparing goes a long way when you come home from a busy day.
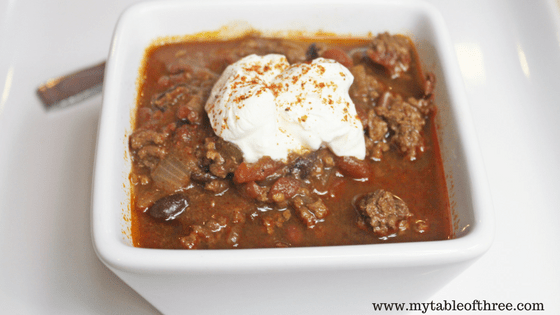
To get started meal prepping you can begin by prepping an extra meal while you are cooking dinner. For instance with this Easy Dump and Go Chili, simply pull out the ingredients and toss it all into the slow cooker while you are preparing your current night’s meal.
Or to make it even easier, double this batch of Chili and enjoy one batch for dinner tonight and freeze the other batch for a meal later. See, meal prep made easy.
Simple Ingredients and Prep!
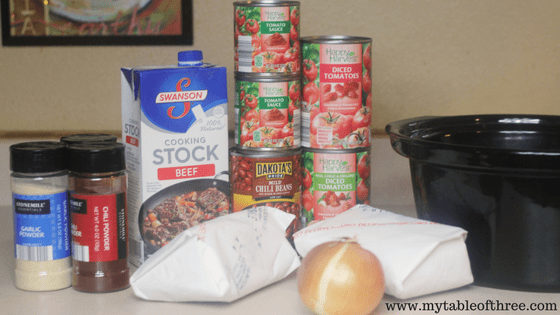
My Dump & Go Chili is one of the simplest recipes I make, yet is it full of flavor and so satisfying. To make this easy Chili recipe you will only need 6 basic ingredients and the traditional chili spices.
The ingredients needed are your choice of lean ground meat, diced tomatoes, tomato sauce, beef stock, a large onion and spices such as chili powder, garlic powder, onion powder, and cumin. I love using venison in my Chili because it is so good for us and for us it is a very frugal choice.
Thanks to those basic ingredients and ease of this recipe, it is perfect for make-ahead meals. It is truly one of my favorites to make on my meal prep days. Dump and Go Chili is a great recipe to start with if you are just beginning with meal prep.
It can’t get simpler than dumping all your ingredients into a slower cooker and forgetting about it until it is done, right?
Slow Cooker to Freezer!
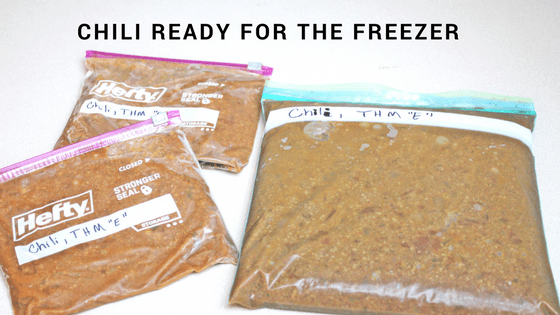
Once the Chili is ready and cooled, it is freezer bound. There are many ways you can store this Dump and Go Chili in the freezer but my favorite options are sturdy freezer bags.
I like to make Dump and Go Chili in double batches so I can freeze some in the gallon bags for our dinners and in some of the smaller quart size bags for single portions lunches.
The Chili is good in the freezer up to a couple of months and tastes just as delicious if not better when thawed and reheated. In my opinion, Chili is one of those foods that gets better with time. To thaw the chili take it out the night before and let it defrost in the fridge.
When you are ready to serve it, you have a few different options. You can add the Chili to bowls and microwave as needed or pour the entire contents into a large pot and reheat on the stove.
I have also added it back to my slow cooker and reheated it on low as we when throughout daily chores. I can honestly say that no matter the method the chili was delicious each time.
Want to see videos of how I meal prep? Then come visit me at My Table of Three over on YouTube!

Dump and Go Chili, Low Fat || Freezer Meal Series
A super easy and low fat chili that is cooked from start to finish in the slow cooker. A great comfort food on those cold winter nights.
Ingredients
- 2 pounds very lean ground beef
- 2 (14 ounce) cans diced tomatoes
- 32 ounces of beef broth
- 2 (8 ounce) cans of tomato sauce
- 1 can of chili beans or pinto beans
- 1 large onion, chopped
- 2 Tablespoons Chili Powder
- 1 Tablespoon Cumin
- 2 teaspoons of garlic powder
- 2 teaspoons of onion powder
- salt to your preferred tastes
Instructions
- Add your ground meat to your slow cooker.
- Open all of the cans of tomatoes and tomato sauce and add them to the slow cooker.
- Next add in the broth, beans, onion, and all of your spices.
Stir well and cook on low for 8-10 hours. - During the 4th or 5 th hours taste the chili and add more seasoning if needed for your tastes.
- The chili will be ready after 4 hours on high or-6 hour on low. The longer it simmers the better the flavors will become. I prefer to cook mine on low at least 8 hours.
- To freezer the chili let it cool completely and then add it freezer bags in your preferred portions sizes. I like to do some in gallon freezer bags for family portions and a few in quart size bags for single lunch portions.
- To reheat simply let your chili thaw over night in the refrigerator and then reheat it on the stove in a large pot or one portion at a time in the microwave. You can also place the frozen chili back in the slow cooker and cook on low for a few hours to heat through.
I am a southern girl through and through that loves to laugh, cook, read and spend time with family. My passions outside of home schooling my son are ministering to those in need and creating art in the kitchen! Every day is an adventure in our little house and I wouldn’t trade it or the chance to share here with you for anything!


Maybe i missed it but can you give me the amounts needed to fix this chili? how much meat(1lb/2lb etc)tomatoes, broth, spices? thanks, pat
Sorry Patricia, there was a strange glitch but the ingredients are showing now.
Silly question but do you brown your meat?
Not silly at all. For this particular recipe, I don’t usually since I am usually rushed when I toss it all in, but you certainly can if you prefer. 🙂
Would love to have some quick new easy recipes for my instant pot. Thank you so much.